Dog Bracing Made Simple

Tips and tricks to help your dog succeed with added support

Border Collie running in yard with a ball in its mouth Photo by Anna Dudkova / Unsplash

Dog Bracing Made Simple

Swelling and the Custom Orthotic

Swelling post-surgery and post-injury is a common occurrence in our pets. The circulatory system is very good at actively pumping blood into a leg but needs muscle contraction and movement for the tissue fluid to be removed through the venous and lymphatic systems. This is why in people, we typically elevate an injured limb. It allows gravity to help move the fluid that has left the blood supply to nourish the tissues to return to the heart and get back in the blood. A process that uninjured tissue does naturally. One way we typically handle post-operative care of an orthopedic injury is to place the ankle or wrist in a Bi-valve cast. The foot, ankle/wrist, and lower leg are wrapped in layers of padding then the cast is applied. This provides stability to the repair but also applies light pressure all around the limb and limits any swelling. The cast is usually replaced every few days to weekly for several weeks while we wait for the Custom Orthotic to be made which will take its place. The Custom Orthotic will allow the pet more mobility yet protect the repair and allow us to remove the Orthotic frequently for Topical/Complementary therapy, Early Range of Motion, and Targeted exercises. Swelling is a minor complication we can see when a pet first starts to wear a Custom Ankle or Wrist Orthotic after being in a cast. The leg is accustomed to being surrounded by padding and a hard fiberglass shell. Now the Hard plastic of the Custom Orthotic is only in the places it needs to be to apply a corrective force. Other areas are left open to allow air movement, decrease weight and increase comfort. These areas may swell a bit in the beginning because the leg is not being treated the same. Blood flows in and fluid may pool a bit in tissue that is by the open areas. This can be from a lack of muscle contraction. One of the major forces that move lymphatic fluid up the leg. As muscles contract, they squeeze lymph vessels and veins to push the fluid back toward the heart. Some of the lymph vessels may be in the repair stage and are not functioning fully yet. The pathway may be narrow like a partially closed road during construction. The tissues of the leg will also need to get used to the light pressure that is applied by the straps that hold the Custom orthotic in place. No one would intentionally leave a new pair of shoes on all day. They would take breaks to rub their feet and adjust the laces of their shoe. The same type of break-in is necessary for Custom Orthotics. It is especially important in cases where we need to provide 24-hour support to a surgically repaired injury like Achilles tendon repair or Arthrodesis/fusion of an ankle or wrist. Giving the pet a 15-20 min break out of the Custom Orthotic every 2-3 hours in the first few days allows for monitoring the leg for rub areas as well as light massage to move fluid out of the leg. Within a few days, the swelling between breaks begins to lessen. The pet becomes more accustomed to using the brace and is walking for short periods more frequently. This improves muscle contraction and the natural movement of fluid out of the leg. The leg also adjusts to and accommodates the strap tension. Swelling is part of the healing process and can be easily managed in most cases. When using a custom orthotic remember to Check the fit frequently. Every 2-3 hours in the beginning. Light massage (not deep tissue massage) starting at the foot and moving up the leg will help with the natural removal of fluid. Once the pet has been in the brace for a few days we can usually start checking the fit every 4-6 hours. Work with your Veterinarian or Rehabilitation Therapist to find what’s optimum for your pet.
Dog being fit with a custom leg brace

Dog Bracing Made Simple

Tech Tips: Custom Brace Break-In Schedule

Just like “Breaking-in” a new shoe, it takes some time to get a dog used to wearing a custom wrist, ankle, or knee brace. When I first fit a brace I always go over the “Break-In Schedule”. By following this schedule your pet can quickly be wearing the brace 8 to 12 hours a day. Here’s my Break-In Schedule Day 1 wear 30 mins 2-3 times a day Day 2 wear 1 hour 2-3 times a day Day 3 wear 2 hours 2-3 times a day Day 4 wear 3 hours 2-3 times a day Day 5 wear 4 hours 2 times a day Day 6 wear 6 hours Day 7 wear 8 hours Continue up to 12 hours a day. Off at night while sleeping. Pets rarely chew on the brace because it has a custom comfortable fit. It is wise to monitor your pet the first week to see how they do. If your pet does start chewing anywhere on the Brace please contact Hero Braces. Being Successful with Proper Strap Tension Straps and Neoprene cuffs should be adjusted several times a day.  Just like you need to adjust your boot laces on a hike, the custom brace will need to be adjusted several times during the day. This happens because the hair coat compresses, swelling moves out of the limb, or the straps and padding stretch a bit during the “Break-In” period. Once a pet has worn the brace several days in a row you will get a feel for how often to adjust strap tension. Remember any hair loss from rubbing should be reported immediately so the problem can be addressed by Hero Braces.  Early reporting prevents sores and time out of the brace. Taking Care of Your Investment Remember to have your pet wear the brace daily, wash the brace weekly with dish soap and remove hair from the Velcro with a toothbrush. Parts should be air-dried. Don’t use a wire brush for cleaning any of the custom brace parts.  It is too harsh and will damage the brace. At Hero Braces we are always ready to help and support you and your pet. Give us a call with any questions on our custom wrist, ankle, and knee braces. By Paul Brumett DVM, CCRP, cAVCA
Close up of a Hero hock brace for an Achilles tendon tear in dogs

Dog Bracing Made Simple

Hero Braces Achilles Tendon Protocol - Conservative Management

Using a Tarsal Brace with Graduated Articulation Most would agree that as practitioners we need to protect the Achilles tendon injury/repair early on and then slowly load the Achilles Tendon over time. That said, it is difficult to find a consensus on how to implement these needs. Below is a jumping-off point, a work in progress, based on my experiences and the knowledge gained from research of my peers. Please leave comments on how you think we should make it better. Partial Achilles Tendon Rupture or Post -Operative Arthrodesis Day 0 -Impression/casting at the time of diagnosis of a partial tear or end of surgery. Custom Orthotic will be taking the place of Bivalve Cast/Splint in 2-3 weeks. Weeks 0-2 -After Casting/Impression is performed place in Bivalve cast/Splint with dorsiflexion of toes, if possible at 45 degrees. Tarsus will typically be at 135 degrees extension. Recheck the bivalve cast weekly. Weeks 3-7  Sutures removed at 10-14 days post-op if used. Fit orthotic to pet. Orthotic is non-articulating. Wear in place of cast 24/7. Owner/practitioner to check 3-4 times a day for pressure sores. Begin rehab therapy. Continue rechecks every two weeks with Surgeon/RDVM. Weeks 8-11  -Cut brace to allow 15 degrees of articulation if a partial tendon rupture. Continue rehab in the clinic and at home. Weeks 12-16:  Pet out of brace or using as a “Sports Brace,” times of high activity. The pet needs to have sufficient strength to maintain a normal standing angle in Hock. The pet should be challenged with the rear leg in a “Three-legged Stand.” Typically 135 Degrees of extension. NOTE: Time intervals are stated as a guide. Some pets will need more or less time as they heal. This is where the “Art” of being a Practitioner is applied. Items to consider: Normal Range of Motion of the Tarsus. Flexion is 40 Degrees, and Extension is 170 Degrees in a relaxed pet. The normal Standing angle of the Tarsus for Tarsal Arthrodesis is 135 Degrees. According to Millis and Levine: Early partial weight-bearing and joint movement creates stress to promote parallel collagen alignment and increase tendon strength. The Hero Brace Tarsal Orthotic may help bypass or relieve weight-bearing forces to the healing tendon, much like incorporating a walking ring into a cast or external fixator. References: Small Animal Surgery 3rd Edition.  Fossum  pgs 1322-1324 Veterinary Surgery Small Animal 2nd Edition. Johnston and Tobios Vol 1 pgs 1204-1209 Small Animal Orthopedics and Fracture Repair 4th Edition. Brinker, Piermattei and Flo pgs 674-678 Canine Rehabilitation and Physical Therapy. Millis and Levine 2nd Edition pg 573 “Calcaneal Tendon Tears in Dogs” Four Leg Rehab Inc Newsletter March-April 2012 Vol1 : Issue 1. Laurie Edge Hughes “Post-Operative Management of Tendon Repairs” Four Leg Rehab Inc Newsletter May-June 2012 Vol 1 : Issue 2. Laurie Edge Hughes Copyright Paul Brumett DVM, CCRP, cAVCA
Malamute/Husky/Akita/Wolf dog standing by woman on top of Mt. Judah Loop Hiking Trail with Donner Lake in background

Dog Bracing Made Simple

Hero Dog: Luke's Story

Luke's story makes him sound like the perfect adventure hero. He was born in the cold, icy fjords of Alaska. His mother was fending for herself in the wild when rescuers were able to save her pups from a life of uncertainty. Luke is a Malamute, Husky, Akita and wolf mix who, at 10 weeks old, moved to California to start a new life with Terri. That's when the adventure really started. Terri and Luke were inseparable for a year and a half. Hiking and exploring the Sierra mountain range and getting into all sorts of trouble together. Their story took a tragic turn three years ago when Luke was struck by a car resulting in a fractured pelvis. A specialist surgeon was able to repair it with a titanium plate, but Luke began to experience sciatic nerve pain. Terri was unsure if the damage developed from the accident or as a result of surgery. To alleviate the pain, the surgeon recommended amputating Luke's leg. Terri would do anything for her best friend, but she wanted to do whatever she could to save Luke's leg. She just so happened to have friends in the veterinary industry with some alternative ideas to eliminate Luke's pain and avoid amputation. Jackie Woelz from the University of California-Davis began a treatment of physical therapy. Wendy Robinson, DVM of Tahoe Integrative Veterinary Care in Truckee, CA added a series of acupuncture. The series of treatments were able to restore enough muscle mass to Luke's leg which had atrophied due to lack of movement. Six anticipated months later, when he was strong enough, Luke received his Hero Brace. Almost immediately, Luke took to the brace and hasn't stopped running, hiking, swimming or enjoying life for the past three years. "Without Ben and Hero (and Monica!) Luke probably would have lost his leg," Terri explains. "Life would not have been much fun. Thanks so much for being out there Hero!" Terri looks forward to the next chapters in their story and the many adventures that await.
Dark Chocolate lab sitting on exam table at the vet

Dog Bracing Made Simple

Understanding CCL Tears in Dogs and How Braces Can Help

Understanding Cruciate Tears in Dogs and How Braces Can Help Cranial Cruciate tears, or CCL tears, are a common injury in dogs and can be seen in most breeds, although sporting and working breeds are seen more often. The CCL is a crucial ligament that stabilizes the knee joint, and when it tears, it can cause significant pain and mobility issues for your furry friend. Understanding the causes, symptoms, and treatment options for CCL tears can help you provide the best care for your dog. Causes of CCL Tears in Dogs CCL tears in dogs can occur due to various reasons. Cruciate disease is a recent term that describes the gradual weakening of the fibers of the Cranial Cruciate Ligament over time. This leads to progressive tearing of the fibers that results in partial or complete failure. This is different from people who can tear their ACL from a fall or accident. Dogs that are overweight, have poor conditioning, or patella luxation are also at risk of CCL tears due to the added stress on their joints. Symptoms of CCL Tears in Dogs Recognizing the symptoms of a CCL tear in your dog is crucial for early intervention. Some common signs include:• Limping or favoring one leg. Can be persistent or off and on.• Difficulty rising or jumping• Swelling around the knee joint• Pain when the knee is touched or moved• Decrease in activity or reluctance to play or jump If you notice any of these symptoms, it's essential to consult your veterinarian for a proper diagnosis and treatment plan. Diagnosis and Treatment Options Diagnosing a CCL tear typically involves a physical examination, testing for Cranial Drawer/Tibial Thrust and radiographs or an MRI. Once confirmed, treatment options can vary depending on the severity of the tear and your dog's overall health. Surgical Treatment In severe cases, surgery may be necessary. There are several surgical techniques available, including: • Tibial Plateau Leveling Osteotomy (TPLO) and CORA Based Leveling Osteotomy (CBLO): This procedure involves making a semi-circular cut under the tibial plateau to allow altering the angle to stabilize the knee joint.• Extra- Capsular Suture Technique: This method uses sutures to mimic the function of the CCL and stabilize the knee.• Tibial Tuberosity Advancement (TTA): This surgery changes the alignment of the Tibial Crest and Quadriceps muscles to reduce stress on the knee. Surgery is considered the Gold Standard in patients that can have anesthesia. Recovery time depends on the severity of the damage to the Cruciate ligament and other structures of the knee. Non-Surgical Treatment For less severe cases or dogs that may not be good candidates for surgery, non-surgical treatment options are available. These can include:• Weight Management: Maintaining a healthy weight can reduce stress on the joints and improve mobility.• Physical Therapy: Exercises and therapies can help strengthen the muscles around the knee and improve stability.• Pain Management: Medications and supplements can help manage pain and inflammation.• Custom Bracing How Braces Can Help 
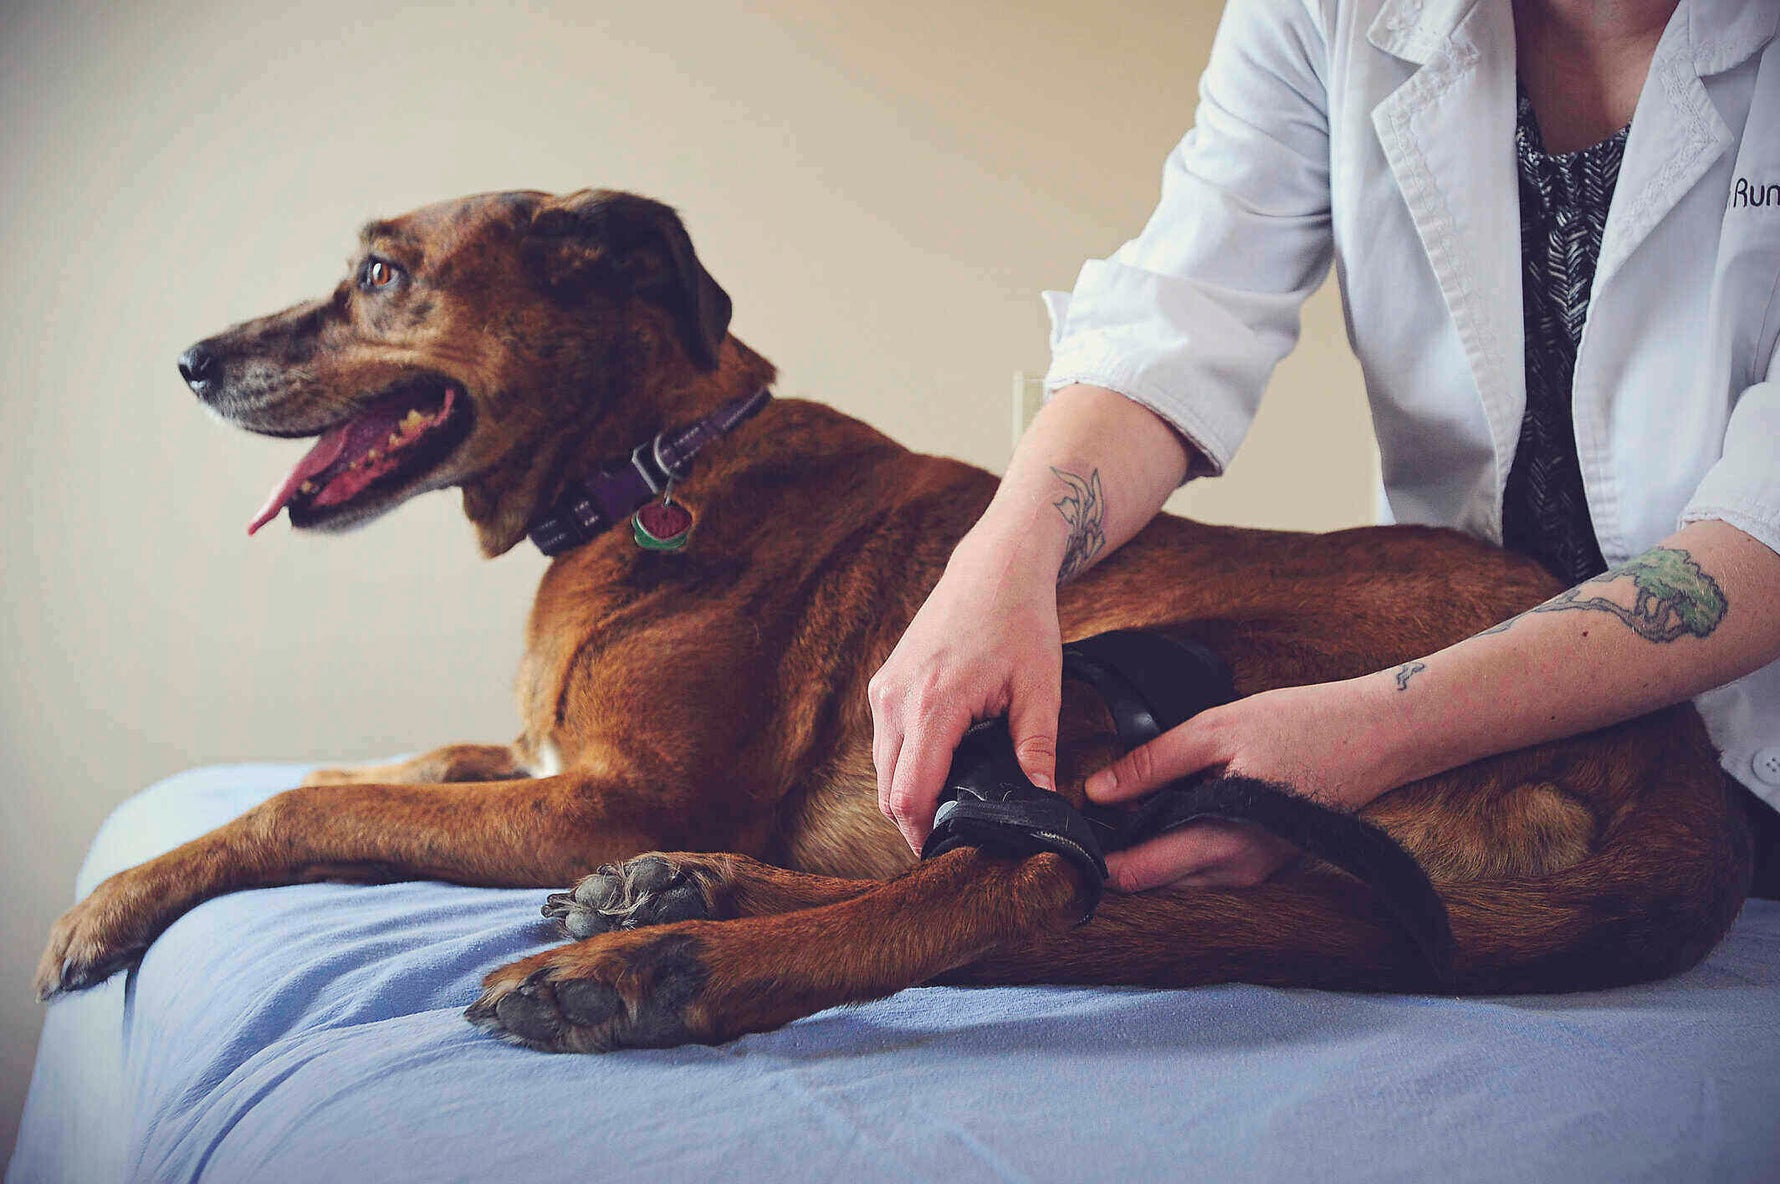
One of the most effective non-surgical treatments for CCL tears in dogs is the use of custom braces. Custom Dog knee braces are designed to provide support and stability to the injured knee, allowing your dog to move more comfortably and reducing the risk of further injury. Benefits of Dog Knee Braces • Support and Stability: Braces help stabilize the knee joint, reducing pain and improving mobility.• Prevent Further Injury: By providing support, braces can help prevent additional damage to the knee.• Comfort: Modern braces are designed to be comfortable and adjustable, ensuring a proper fit for your dog.• Cost-Effective: Compared to surgery, braces are a more affordable option for managing CCL tears. Choosing the Right Brace   When selecting a knee brace for your dog, it's essential to consider factors such as size, fit, materials and whether it will be custom made for your pet. Custom braces have a better fit and function than soft over the counter braces. Consulting your veterinarian for recommendations and aftercare will ensure the brace is properly fit to provide maximum support. Conclusion CCL tears in dogs can be a challenging and painful condition, but with the right care and treatment, your furry friend can recover and enjoy a happy, active life. Whether through surgery, physical therapy, the use of a Custom brace, or a combination, there are options available to help manage CCL tears and improve your dog's quality of life. Always consult your veterinarian for the best course of action and provide your dog with the love and support they need during their recovery.
Golden retriever dog wearing an ankle brace for an Achilles tear

Dog Bracing Made Simple

Achilles Ruptures in Dogs - Hunter's Story

It’s been a relaxing spring day at your house. As you leave the kitchen, you realize that your senior Golden Retriever is no longer by your side. You look back to see him struggling next to the dishwasher, one rear leg caught under the sharp sheet metal edge. You act quickly. Minutes later, you have untangled his leg and are confronted with a deep cut above his ankle. Your mind races as you prepare to go to the vet. Is this repairable? How long will it take to recover? Who has the knowledge to help? Hunter’s Journey This is what happened to Hunter, Amy’s low-key Golden Retriever.  Amy knew that he needed immediate attention and had the Achilles tendon on the back of his ankle repaired by a veterinarian. Amy was told Hunter would be in a cast for 8 weeks and then start several months of physical therapy or “Rehab”. During rehab, the tendon would still be healing and would need support if Hunter were to go back to his normal play quickly. Who could help guide her through the healing process and provide a quality brace? His Therapist to the Rescue Luckily, Jolene, Hunter’s rehab therapist at VCA PineRidge, suggested supporting the leg with a custom ankle brace from Hero Braces. Their team guided Hunter through the process to create a brace to support his hock. This brace allowed Hunter to be more active right away and served to protect the Achilles tendon as he regained strength. Amy felt that wearing the Hero Brace gave Hunter more confidence to move and play during his recovery, and now, a year later, he continues to do well. Even though Hunter has been given permission to go without his Hero Brace, ”Hunter is more confident when he wears it,” Amy noted, and “Hunter won’t jump or use stairs without his brace.” He is “just as mobile now with the brace as he was before” his injury. “His brace gives him confidence so he can let his playful spirit shine!” Healing Achilles Injuries in Dogs Achilles tendon injuries can be debilitating if left alone, and even after corrective surgery, the tendon is never quite as strong and can require continued custom support. Hero Braces has a custom Ankle Brace that allows your dog to play sooner and fits in nicely with traditional Rehab. Although Hunter still wears his brace daily, many pets graduate and no longer use the brace daily or use it only when playing hard or going on hikes.  As an owner, it’s comforting to know that Hero Braces is there to help speed recovery and prevent re-injury. Does your dog have an Achilles injury? Consider a hock brace.     Update:  After a full life, our gentle-souled Hunter recently crossed the rainbow bridge.  He will always be close to our hearts.  Hunter's mom, Amy, made a beautiful video of his life.  Please watch it here.
Veterinarian hold up a cast for a custom dog brace

Dog Bracing Made Simple

4 Tips - The Perfect Dog Brace Cast

Creating the perfect Casting can be summed up in four essential tips. Position. Tight. High. Criss-Cross. Understand each to make yourself the Casting superstar for Custom Orthotics! Let’s be clear on what “Casting” means in this article. Old school casts meant a kid with a broken arm had white plaster wrapped from elbow to wrist. These aren’t your old school casts! The word “Cast or Casting” is used because it sounds like “cast.” The material is fiberglass casting tape, used to make an impression of the limb. Position - The "Magic" of Walking Easily   This is where Hero Dog Braces really differ from other custom bracing. We ask for a cast with the dog lying on its side instead of standing. This is important for a couple of reasons. First is gravity.  Gravity is really what feeds any deformity.  The body weight pushes down on the legs, worsening the deformity.  Casting a dog while lying down neutralizes gravity, allowing you to focus on getting the limb into the corrected position. Second is rational.  Can you really get a dog to stand still for 15 minutes while the cast sets? Much less "correct" the leg while doing this. In our vet clinic, our team holds the dog to trim its nails. Casting is no different. So how do we correct the position?  It is important to remember what deformity we are trying to support. The cranial drawer of a cruciate tear is a unique motion. We reduce it differently from angular deformities like varus or valgus. When casting for the Knee Brace, pull the leg straight down perpendicular to the body. This will reduce the cranial drawer. Trying to cast in a “natural” standing position can cause the tibia to shift forward and adversely affect the fit and function of the custom orthotic. For the Ankle Brace, place the foot and ankle in a natural standing position.   The Wrist Brace reduces any varus (foot angled towards midline) or valgus (foot angled away from midline) deformity and places the foot in a natural standing angle. Typically, the pet is straight through the wrist, but it can vary with breed. If this one is confusing, give us a call, and we can help guide you through the process. Tight - Show us the Boney Landmarks   A Tight Casting is necessary for precision work. When the Hero Braces lab has exact dimensions taken from the Casting, they can create the best custom fit.   The Casting tape should be wrapped snugly to outline the bony prominences or bumps on the leg. If the Casting tape does not have sufficient tension, it will droop and fail to outline the prominences. This creates guesswork for the lab or necessitates another Cast. Remember, no padding is added, just a layer of stockinette to protect the limb. This keeps the Cast true to the leg's shape. Because the Cast will be removed as soon as it hardens, you don’t need to worry about pressure points. High - Capture the Groin   For the stifle, make sure the protective stockinette goes high into the groin or beyond the area to be cast. This is really important to have your helper focus on keeping the stockinette high. Notice where the hands are; it really helps to pull the stockinette high in the inside of the leg. When starting the Cast, casting tape is spiraled up the leg with a 50% overlap. The Casting tape wraps high into the groin for Custom Dog Knee Braces or to the joint above for the Wrist and Ankle Braces. Be sure to wrap to the end of the foot for our Custom Wrist and Ankle Braces. This technique enables the Hero Brace lab to identify landmarks, take measurements, and plan the proper dimensions of the Custom Brace. Criss-Cross - Make it Strong AND Thin This tip will make you happy when it comes time to cut off the cast. A thin cast is so much easier to cut through. A 50% overlap of the Casting material wrapped around the limb is completed by spiraling down at a 45-degree angle, like the spiral on a candy cane. Criss-crossing the material's weave creates a strong yet light Cast. The three layers created are thin enough to be cut off easily, yet they stay together during shipping and at the lab. For reference, download our Casting Tips PDF. For a more in-depth video about casting.  Watch our course from the UT Canine Rehab Lab If you have any questions or need a little help, we are here to support you. Make a quick phone call or send us an email. Hero Braces want to help you help more pets.