Dog Bracing Made Simple

Tips and tricks to help your dog succeed with added support

Border Collie running in yard with a ball in its mouth Photo by Anna Dudkova / Unsplash

Dog Bracing Made Simple

Swelling and the Custom Orthotic

Swelling post-surgery and post-injury is a common occurrence in our pets. The circulatory system is very good at actively pumping blood into a leg but needs muscle contraction and movement for the tissue fluid to be removed through the venous and lymphatic systems. This is why in people, we typically elevate an injured limb. It allows gravity to help move the fluid that has left the blood supply to nourish the tissues to return to the heart and get back in the blood. A process that uninjured tissue does naturally. One way we typically handle post-operative care of an orthopedic injury is to place the ankle or wrist in a Bi-valve cast. The foot, ankle/wrist, and lower leg are wrapped in layers of padding then the cast is applied. This provides stability to the repair but also applies light pressure all around the limb and limits any swelling. The cast is usually replaced every few days to weekly for several weeks while we wait for the Custom Orthotic to be made which will take its place. The Custom Orthotic will allow the pet more mobility yet protect the repair and allow us to remove the Orthotic frequently for Topical/Complementary therapy, Early Range of Motion, and Targeted exercises. Swelling is a minor complication we can see when a pet first starts to wear a Custom Ankle or Wrist Orthotic after being in a cast. The leg is accustomed to being surrounded by padding and a hard fiberglass shell. Now the Hard plastic of the Custom Orthotic is only in the places it needs to be to apply a corrective force. Other areas are left open to allow air movement, decrease weight and increase comfort. These areas may swell a bit in the beginning because the leg is not being treated the same. Blood flows in and fluid may pool a bit in tissue that is by the open areas. This can be from a lack of muscle contraction. One of the major forces that move lymphatic fluid up the leg. As muscles contract, they squeeze lymph vessels and veins to push the fluid back toward the heart. Some of the lymph vessels may be in the repair stage and are not functioning fully yet. The pathway may be narrow like a partially closed road during construction. The tissues of the leg will also need to get used to the light pressure that is applied by the straps that hold the Custom orthotic in place. No one would intentionally leave a new pair of shoes on all day. They would take breaks to rub their feet and adjust the laces of their shoe. The same type of break-in is necessary for Custom Orthotics. It is especially important in cases where we need to provide 24-hour support to a surgically repaired injury like Achilles tendon repair or Arthrodesis/fusion of an ankle or wrist. Giving the pet a 15-20 min break out of the Custom Orthotic every 2-3 hours in the first few days allows for monitoring the leg for rub areas as well as light massage to move fluid out of the leg. Within a few days, the swelling between breaks begins to lessen. The pet becomes more accustomed to using the brace and is walking for short periods more frequently. This improves muscle contraction and the natural movement of fluid out of the leg. The leg also adjusts to and accommodates the strap tension. Swelling is part of the healing process and can be easily managed in most cases. When using a custom orthotic remember to Check the fit frequently. Every 2-3 hours in the beginning. Light massage (not deep tissue massage) starting at the foot and moving up the leg will help with the natural removal of fluid. Once the pet has been in the brace for a few days we can usually start checking the fit every 4-6 hours. Work with your Veterinarian or Rehabilitation Therapist to find what’s optimum for your pet.
Australian Shepard wearing a Hero Brace stifle brace without a top strap

Dog Bracing Made Simple

Stifle Braces in Dogs: Freedom Without the Top Strap

As devoted pet parents, we witness the sheer exuberance our dogs bring to life. But when injury strikes, it’s our duty to find solutions that restore their mobility and joy. Enter the canine stifle brace, a remarkable aid for dogs suffering from CCL (cranial cruciate ligament) tears. Canine CCL Tears Canine CCL tears can severely impact a dog’s stifle joint (akin to our human knee). These tears result from factors like obesity, strenuous activity, genetics, and aging. Certain breeds, including Labrador Retrievers, Staffordshire Terriers, and Saint Bernards are more susceptible. Symptoms vary from limping to complete lameness. If your furry friend shows signs of ligamentdamage, consult your veterinarian. They’ll perform a physical evaluation and X-rays to confirm the diagnosis. Surgery and Beyond While surgery is recommended and considered the standard of care, it’s not always feasible due to health issues or cost. That’s where non-invasive treatments come into play: • Joint Supplements: Fish oil, turmeric, glucosamine, and chondroitin sulfate aid in comfort.• Diet and Exercise Modifications: Proper nutrition and controlled activity help maintain a healthy weight.• Integrative Therapies: Acupuncture, Laser therapy, Extracorporeal Shockwave, Pulsed Electromagnetic Field, Animal Chiropractic, and Physical Rehab support recovery.• Pain Management: Medications alleviate discomfort.• Custom Bracing: Supports the stifle and applies corrective forces to help prevent excessive movement. The No Top Strap Solution Hero Braces revolutionized canine stifle support. Unlike traditional braces, they skip the top strap, offering unparalleled comfort and freedom. Here’s how they work:• Stabilization: Hero Braces focuses on increased stability for rear legs and knees. • Custom Fabrication: Each brace is tailor-made to fit your dog’s unique body structure, ensuring optimal support. Why Hero Braces? • Durability: Hero Braces withstand rough play. No worries about stretching or tearing fabric.• Sleek Design: Lightweight and sleek, they won’t hinder your dog with extra weight.• Custom Fit: With over 200 dog breeds, customization matters. Hero Braces nails it. The Science Behind the Top Strap Removal Hero Braces initially explored the force-couple concept, akin to approaches used in human medicine for addressing cruciate tears. However, canine biomechanics posed unique challenges. The origin and insertion of hamstring muscles in dogs differ from humans, affecting brace fit. Canine thighs change shape significantly during hip and stifle (knee) movement, causing fitting issues. The top strap often loosened during walking due to changing thigh size. To address this, Hero Braces consulted biomechanists at the University of Nebraska. They found that maintaining tension without design changes was mathematically impossible. By removing the strap, Hero Braces reduced fitting issues while still mitigating tibial thrust and cranial drawer. Our clinical experience showed that pets continue to do well without the top strap. For a deeper dive, watch out for Drs. Millis and Levine’s upcoming textbook on Canine Rehabilitation and Physical Therapy. Remember, a stifle brace isn’t just a device; it’s hope for your beloved companion. Whether your pup is a playful Labrador or a dignified St. Bernard, consider this simple solution to restore their zest for life. I hope this blog sheds light on the innovative design of no-top strap stifle braces. If you have any questions, visit Hero Braces.
Dog being fit with a custom leg brace

Dog Bracing Made Simple

Tech Tips: Custom Brace Break-In Schedule

Just like “Breaking-in” a new shoe, it takes some time to get a dog used to wearing a custom wrist, ankle, or knee brace. When I first fit a brace I always go over the “Break-In Schedule”. By following this schedule your pet can quickly be wearing the brace 8 to 12 hours a day. Here’s my Break-In Schedule Day 1 wear 30 mins 2-3 times a day Day 2 wear 1 hour 2-3 times a day Day 3 wear 2 hours 2-3 times a day Day 4 wear 3 hours 2-3 times a day Day 5 wear 4 hours 2 times a day Day 6 wear 6 hours Day 7 wear 8 hours Continue up to 12 hours a day. Off at night while sleeping. Pets rarely chew on the brace because it has a custom comfortable fit. It is wise to monitor your pet the first week to see how they do. If your pet does start chewing anywhere on the Brace please contact Hero Braces. Being Successful with Proper Strap Tension Straps and Neoprene cuffs should be adjusted several times a day.  Just like you need to adjust your boot laces on a hike, the custom brace will need to be adjusted several times during the day. This happens because the hair coat compresses, swelling moves out of the limb, or the straps and padding stretch a bit during the “Break-In” period. Once a pet has worn the brace several days in a row you will get a feel for how often to adjust strap tension. Remember any hair loss from rubbing should be reported immediately so the problem can be addressed by Hero Braces.  Early reporting prevents sores and time out of the brace. Taking Care of Your Investment Remember to have your pet wear the brace daily, wash the brace weekly with dish soap and remove hair from the Velcro with a toothbrush. Parts should be air-dried. Don’t use a wire brush for cleaning any of the custom brace parts.  It is too harsh and will damage the brace. At Hero Braces we are always ready to help and support you and your pet. Give us a call with any questions on our custom wrist, ankle, and knee braces. By Paul Brumett DVM, CCRP, cAVCA
Close up of a Hero hock brace for an Achilles tendon tear in dogs

Dog Bracing Made Simple

Hero Braces Achilles Tendon Protocol - Conservative Management

Using a Tarsal Brace with Graduated Articulation Most would agree that as practitioners we need to protect the Achilles tendon injury/repair early on and then slowly load the Achilles Tendon over time. That said, it is difficult to find a consensus on how to implement these needs. Below is a jumping-off point, a work in progress, based on my experiences and the knowledge gained from research of my peers. Please leave comments on how you think we should make it better. Partial Achilles Tendon Rupture or Post -Operative Arthrodesis Day 0 -Impression/casting at the time of diagnosis of a partial tear or end of surgery. Custom Orthotic will be taking the place of Bivalve Cast/Splint in 2-3 weeks. Weeks 0-2 -After Casting/Impression is performed place in Bivalve cast/Splint with dorsiflexion of toes, if possible at 45 degrees. Tarsus will typically be at 135 degrees extension. Recheck the bivalve cast weekly. Weeks 3-7  Sutures removed at 10-14 days post-op if used. Fit orthotic to pet. Orthotic is non-articulating. Wear in place of cast 24/7. Owner/practitioner to check 3-4 times a day for pressure sores. Begin rehab therapy. Continue rechecks every two weeks with Surgeon/RDVM. Weeks 8-11  -Cut brace to allow 15 degrees of articulation if a partial tendon rupture. Continue rehab in the clinic and at home. Weeks 12-16:  Pet out of brace or using as a “Sports Brace,” times of high activity. The pet needs to have sufficient strength to maintain a normal standing angle in Hock. The pet should be challenged with the rear leg in a “Three-legged Stand.” Typically 135 Degrees of extension. NOTE: Time intervals are stated as a guide. Some pets will need more or less time as they heal. This is where the “Art” of being a Practitioner is applied. Items to consider: Normal Range of Motion of the Tarsus. Flexion is 40 Degrees, and Extension is 170 Degrees in a relaxed pet. The normal Standing angle of the Tarsus for Tarsal Arthrodesis is 135 Degrees. According to Millis and Levine: Early partial weight-bearing and joint movement creates stress to promote parallel collagen alignment and increase tendon strength. The Hero Brace Tarsal Orthotic may help bypass or relieve weight-bearing forces to the healing tendon, much like incorporating a walking ring into a cast or external fixator. References: Small Animal Surgery 3rd Edition.  Fossum  pgs 1322-1324 Veterinary Surgery Small Animal 2nd Edition. Johnston and Tobios Vol 1 pgs 1204-1209 Small Animal Orthopedics and Fracture Repair 4th Edition. Brinker, Piermattei and Flo pgs 674-678 Canine Rehabilitation and Physical Therapy. Millis and Levine 2nd Edition pg 573 “Calcaneal Tendon Tears in Dogs” Four Leg Rehab Inc Newsletter March-April 2012 Vol1 : Issue 1. Laurie Edge Hughes “Post-Operative Management of Tendon Repairs” Four Leg Rehab Inc Newsletter May-June 2012 Vol 1 : Issue 2. Laurie Edge Hughes Copyright Paul Brumett DVM, CCRP, cAVCA
Cocker Spaniel standing on the beach in California wearing WiggleLess back brace

Dog Bracing Made Simple

Canine Intervertebral Disc Disease

Canine intervertebral disc disease or IVDD is a condition where the disc material between two vertebral levels deteriorates and extrudes into the vertebral canal, compressing the spinal cord. The result is a varying degree of neurological deficit, affecting the dog’s ability to walk, perceive sensation, or have bladder and bowel control. The current recommendation for dogs with IVDD is to undergo surgical intervention as soon as possible following the occurrence of symptoms. However, for many owners and their dogs, surgical intervention is just not an option. If this is the case, what can be done for these dogs? Understanding intervertebral disc disease Intervertebral discs sit between the vertebrae throughout the length of the spine. While we like to think of intervertebral discs as separate from one another, in reality they are very connected – we should consider them as part of one structure. The disc is made up of an outer ring, the annulus fibrosus, and an inner portion, known as the nucleus pulposus. The nucleus pulposus is gelatinous and has a very high water content. When Things Go Wrong If the disc degenerates, the annulus fibrosus becomes hard and brittle, making it prone to rupture, while the nucleus pulposus becomes calcified and solid. In the event of a disc herniation, the annulus fibrosus can remain intact but change its shape and protrude into the spinal cord. Alternatively, the annulus fibrosus can rupture, causing the nucleus pulposus to escape into the spinal cord. In both cases the spinal cord becomes compressed. Categorizing Disc Disease IVDD is usually categorized into one of two categories. Acute Hansen Type 1 extrusion In this condition, the annulus fibrosus ruptures and the nucleus pulposus escapes into the spinal cord, causing compression of the spinal cord and neurological deficits in the patient. This usually occurs in chondrodystrophic breeds between 3 and 7 years of age, with the signs of dysfunction progressing over the course of a few days. These dogs are usually in great pain. Chronic Hansen Type 2 protrusion In this condition, the annulus fibrosis remains intact, but loses its shape and starts to bulge into the vertebral canal. This often occurs on more than one spinal level, and it can be very difficult to determine which spinal level is responsible for the neurological symptoms in the patient. This condition usually occurs in older, large breed dogs with slowly progressing neurological signs. Often these patients are affected with other conditions, such as arthritis. Discerning deep pain The presence or absence of deep pain sensation in IVDD patients creates a large divide in how we think about these patients’ treatment, and their prognosis for recovery. Patients who have deep pain sensation intact have a good prognosis for a return to function. Patients who do not have deep pain sensation have a poorer or guarded prognosis for recovery. This seems to be true whether surgery is performed. Treatment For dogs that lose their ability to walk, surgery is currently the recommended treatment route. In this article, we will not be discussing surgical treatment, but rather medical management. Learn more about the different surgical techniques and whether surgical intervention is the best option for your animal by speaking to your vet. Medical management Medical management usually includes a combination of cage rest, pain control, bladder management and rehabilitation or physiotherapy. Rest This can be the most challenging component of medical management. Rest aims to improve the condition in a few ways: • preventing further extrusion of the disc material into the vertebral canal; • allowing the body time to resorb the disc material within the spinal canal; • protecting the dog from further injury because of neurological deficits and a inability to walk. There are many different recommendations for the duration of rest and how strict rest needs to be. Dr Paul Freeman recommends at least one week of strict cage rest, followed by three weeks of exercise restriction and cage rest when necessary. We can help make rest easier with a few enrichment activities and modifications to the environment to ensure that the dog receives mental stimulation and social interaction, remaining part of the daily activities of the household. Pain Control A multi-modal approach to pain control is highly recommended. The pain needs to be managed as quickly and efficiently as possible. Many veterinarians will prescribe a combination of opioids, NSAIDs, and gabapentin – please discuss pain control with your treating veterinarian. Rehabilitation and Physiotherapy The primary goal of physiotherapy is to help the patient regain function as quickly as possible. We also want to facilitate the best possible quality of functional motion. There are a few ways in which we might work towards these goals. Rehabilitation of Neurological Conditions The rehabilitation of neurological conditions focuses on helping the patient to regain function. During the initial phases of rest, a rehab therapist can help both the owner and the patient negotiate the challenge of confinement with advice on the following areas: • Mental games that help build postural awareness and stability • Advice on incorporating the patient into activities of the household safely• Massage and gentle traction techniques that may be performed with the patient daily to reduce pain and encourage healing• Gait retraining that can be performed daily to help maintain the muscle and sensory stimulation from the affected areas without stressing the spine• Fitment of supportive devices such as harnesses, back braces, carts, etc., depending on the needs of the client and the patient. As the patient begins to heal and regain function, the rehab therapist will continue to aid in optimizing function in a variety of ways. A Rehab therapist plays an essential supportive role as they help to overcome the individual challenges faced by the owner and the patient throughout the stages of progression and healing. 
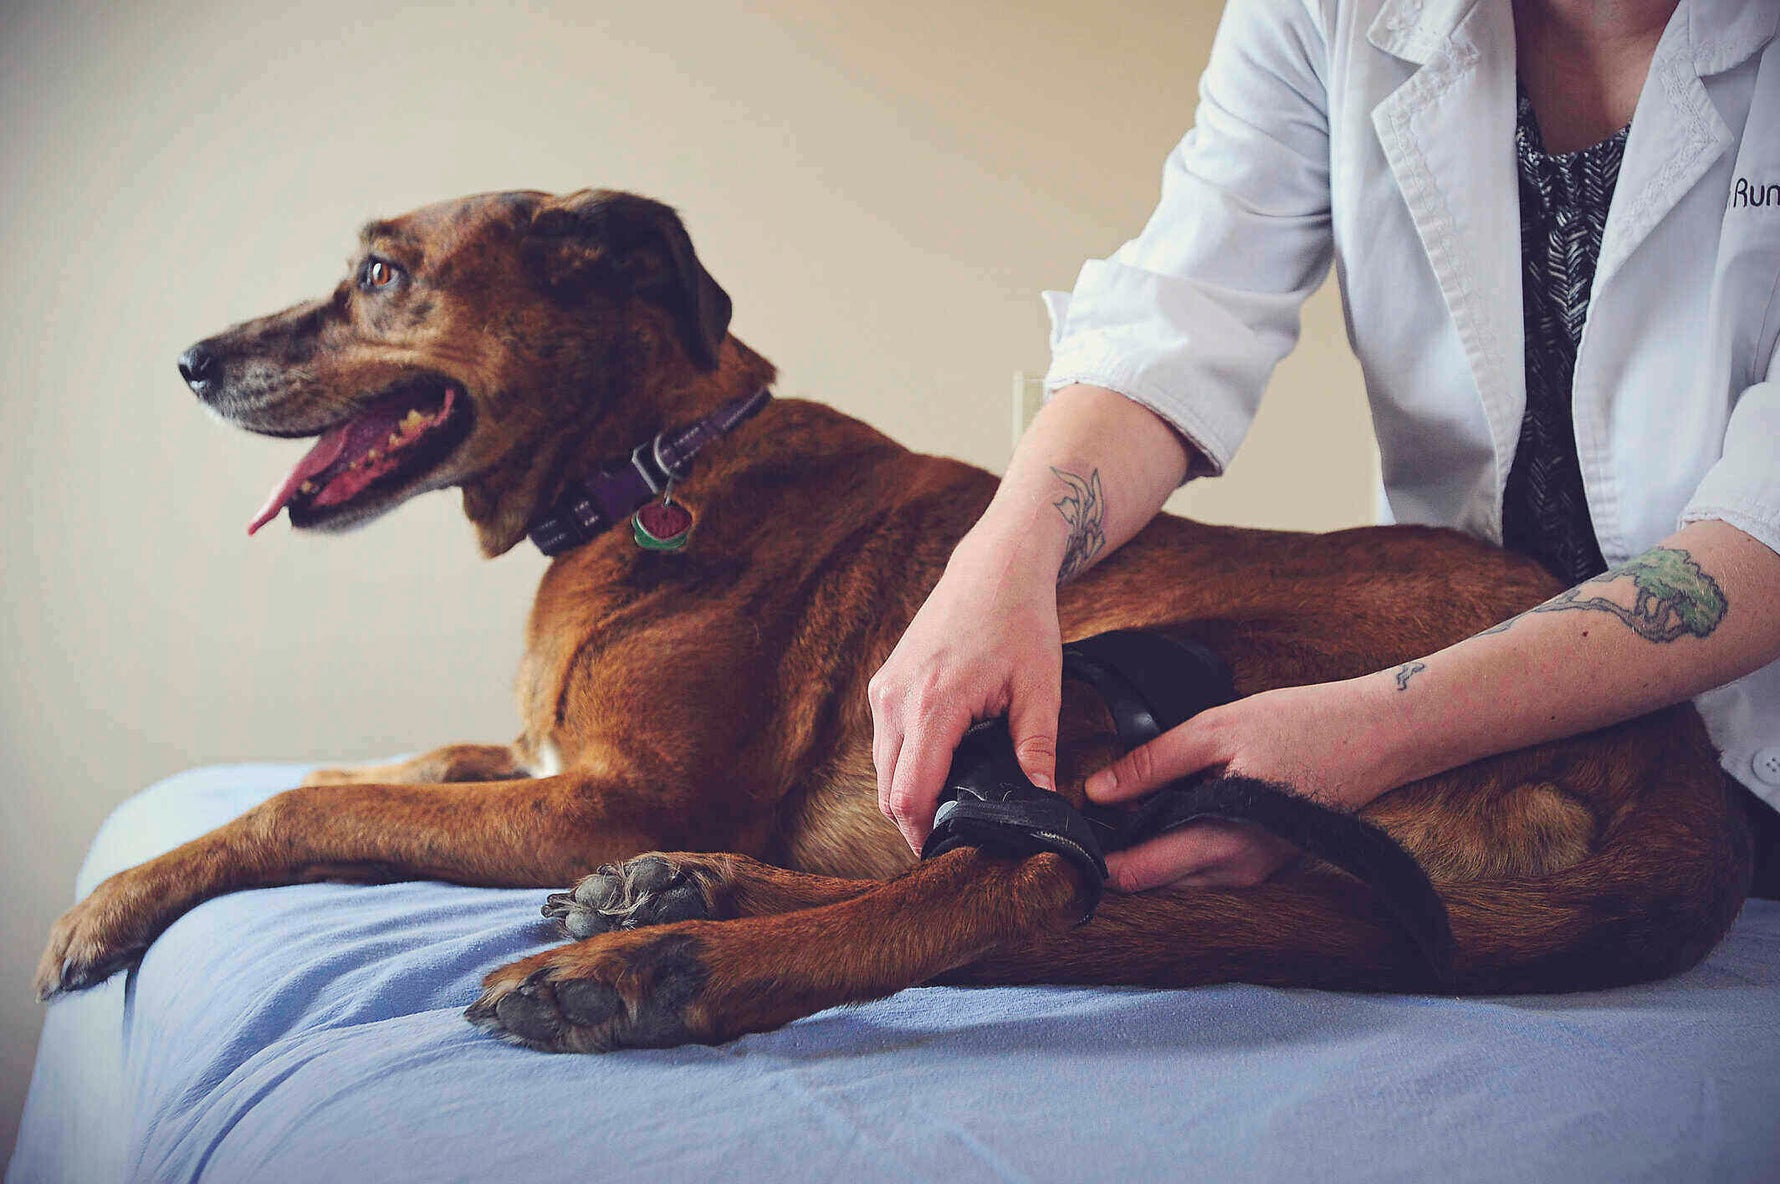
The Use of a Back Brace for IVDD The use of a back brace for dogs with IVDD may be indicated in a few different instances. A back brace is protective, helping to stabilize the spine and reduce movement through the back, making it ideal to use during the phases of rest when we want to prevent any further damage to the intervertebral discs. As dogs with IVDD start to regain function, they can be very ataxic, with large anduncontrolled movements of their limbs and back occurring throughout movement. Using a back brace during walking can help stabilise the body, preventing uncontrolled ataxic movement that can be damaging to the spine and the soft tissues of the back and limbs. When the dog practices walking in a straight and stable fashion, we also strengthen those neurological pathways, establishing them as the norm. In other words, the more the dog practises with correct posture, the more it will become second nature. Walking with incorrect posture will have the opposite effect, establishing damaging movements as the norm. Chronic type 2 IVDD, especially, can benefit from the use of a back brace during periods of activity. The back brace is also something that can be used during strenuous exercise once the dog has recovered function, or in the event of a recurrence of IVDD in the future.  
Dog smelling a cast for a custom leg brace

Dog Bracing Made Simple

The Casting/Impression, “As easy as Wrapping a Bandage?!”

Does the Custom Orthotic Casting Process Intimidate You? If you really think about it, the impression process isn't much different than wrapping a bandage.  We find vet nurses excel at the process in the CE courses we teach! Check out a video of our CE course at the bottom of this blog. Old-School Casts....Don't Make Me Cringe! Many Doctors are hesitant to work with Orthotics because of the Casting/Impression process. Mention the word “cast” and Doctors envision an old-fashioned plaster cast that is removed with a saw. This material was fine in its day but today is not needed for the Impression process. The fiberglass impression material currently used is easier to work with and does not require a saw for removal.   Creating a dog’s custom knee, ankle or wrist brace is a breeze. Hero Braces has tried to simplify the process to make successful impressions a breeze. As easy as wrapping a bandage. Creating the Impression for a custom brace is an easy task.  As practitioners, bandages are something we use daily. The light tension and 50% overlap used in creating a bandage are the same when creating an Impression. Patients can lie in lateral recumbency and staff use is the same. Sedation is rarely needed. The fiberglass material used in the Impression is thin and cuts easily once it cures. I don’t have time. We all worry about the time it takes to get tasks done. The Impression process can take as little as 15 mins. Many practices have qualified Veterinary Nurses that place bandages for their Doctors every day.  The Casting/Impression can be turned over to them as well, freeing up the Doctor to diagnose and prescribe Hero Braces as treatment for issues such as Cranial Cruciate Ligament Rupture, Hyperextension of the Carpus and Achilles Tendon Injuries. We’ve got the tools you need. Our impression kit comes with everything you need to complete the process and we are here to help. Stockinette to cover and protect the limb Fiberglass tape to create the impression A guarded blade knife to cut the Casting/Impression tape A grooved strip to place under the Casting/Impression tape to guard the limb and act as a cutting guide Online and in person labs to demonstrate and practice the process Anything new can be intimidating. The Casting/Impression uses similar techniques to wrapping a bandage and is learned quickly by you and your staff. Let us help you help more pets. Call Hero Braces for a Casting/Impression kit today. We teach casting at the University of Tennessee Canine Rehab Certificate Course. Below is a video of us teaching the casting process. Watch it to feel confident about casting.  It really is just a version of bandaging!  
The Drama Behind Ear Trauma:  Everything you need to know about aural hematomas.

Dog Bracing Made Simple

The Drama Behind Ear Trauma: Everything you need to know about aural hematomas.

Your dog has been shaking his head a lot lately, and then suddenly, you see something disturbing: His ear flap has swelled up. Aural hematomas are also known as ear hematomas or even blood blisters. An aural hematoma usually forms from trauma to a dog’s ear — often from head shaking — that causes a blood vessel or vessels to break and bleed into the area between skin and cartilage that make up the ear. Aural hematomas are often a result of an underlying issue like allergies, ear infections, or something in the ear canal like a tick, mites, or a grass lawn. These will cause a dog’s ears to feel itchy or uncomfortable, leading to shaking and scratching at his head and ears — and resulting in ear trauma. Effective treatment involves treating the hematoma while also treating the underlying condition. Conditions Leading to Ear Hematoma Environmental and food allergies can both lead to a lot of itching and discomfort in pets. There are many potential triggers for both kinds of allergies — from chicken and corn in food to pollen, grass, and mold in the environment. Allergies in themselves can take some investigation to figure out, but elimination diets and allergy testing may be a good place to start if these are suspected. An ear infection is another condition that may cause a dog to shake his head excessively. They are painful and uncomfortable. When ear infections are chronic, there may be underlying conditions — including allergies and hormonal imbalances like hypothyroidism, for example. So if your dog is getting a lot of ear infections, it’s important to figure out the root cause. Dogs who spend a lot of time outdoors may end up with something in their ear — like a tick or grass awn. As you can imagine, this is highly uncomfortable for a dog and will cause him to shake his head. Fortunately, once the foreign body, like a tick, is removed from your dog’s ear, the problem should rectify itself on its own. If you have a younger dog with itchy ears, he may have ear mites. Some signs of these tiny parasites include head shaking, scratching ears, ears that droop when they’re usually upright, smelly ears, and a dark, coffee-ground-like discharge. Puppies and young dogs are more prone to get ear mites than adult dogs. Of course, there are other reasons why a dog might shake his head enough to cause an ear hematoma, like a bug bite, so it’s important to keep a watchful eye if you notice any excessive shaking by your dog. Aural Hematoma Treatment There are a few ways an ear hematoma is treated. Surgery is one common treatment and involves draining the hematoma and suturing the ear flap while the dog is under sedation. A vet may also choose to use a syringe to aspirate the fluids out of a dog’s ear flap or place a drain to remove the blood until it heals and bandages the head and ear. Holistic remedies may include homeopathy, topical applications of yarrow oil and/or witch hazel, and compression wraps. The Surgi-Sox Aural Compression Bandage is an alternative for head and ear bandaging. It helps prevent damage to the ear during head shaking. It can also reduce head shaking and help keep ear medications inside the ear to treat underlying ear conditions. A compression wrap may help a hematoma from getting worse or keep a new one from forming. An ear hematoma may actually heal on its own over time. However, it can result in scar tissue and deformation known as “cauliflower ear,” which can block the ear canal. It’s best to consult a vet to develop the best plan to treat your dog’s ear hematoma, which should also include addressing any underlying conditions. Prevention Ideally, a dog never gets an ear hematoma in the first place. If you start to notice your dog shaking his head or scratching at his ears excessively, take note and act quickly before it turns into something worse. Check his ears for foreign objects and make sure he’s not hurting himself. If it continues, start looking into possible causes, including allergies, infections, and ear mites, and schedule a veterinary visit.
Veterinarian smiling at a dog while fitting a Hero leg brace

Dog Bracing Made Simple

Bracing Made Simple

Were you taught bracing in school? Probably not, though bracing has been around for 20+ years; it is just now being taught in Vet Schools like UT. That's why we are bringing you expert advice from our years of experience with bracing. Dr. Brumett and our Orthotist Ben Blecha break down bracing to make it simple for you and your staff to easily implement bracing into your practice. Sign up today! Be the expert in your patient room. --Feel more confident with weekly bite-sized videos --Increase your patient's quality of life. --Grow your clinic by helping dogs that cannot be helped by surgery
Veterinarian hold up a cast for a custom dog brace

Dog Bracing Made Simple

4 Tips - The Perfect Dog Brace Cast

Creating the perfect Casting can be summed up in four essential tips. Position. Tight. High. Criss-Cross. Understand each to make yourself the Casting superstar for Custom Orthotics! Let’s be clear on what “Casting” means in this article. Old school casts meant a kid with a broken arm had white plaster wrapped from elbow to wrist. These aren’t your old school casts! The word “Cast or Casting” is used because it sounds like “cast.” The material is fiberglass casting tape, used to make an impression of the limb. Position - The "Magic" of Walking Easily   This is where Hero Dog Braces really differ from other custom bracing. We ask for a cast with the dog lying on its side instead of standing. This is important for a couple of reasons. First is gravity.  Gravity is really what feeds any deformity.  The body weight pushes down on the legs, worsening the deformity.  Casting a dog while lying down neutralizes gravity, allowing you to focus on getting the limb into the corrected position. Second is rational.  Can you really get a dog to stand still for 15 minutes while the cast sets? Much less "correct" the leg while doing this. In our vet clinic, our team holds the dog to trim its nails. Casting is no different. So how do we correct the position?  It is important to remember what deformity we are trying to support. The cranial drawer of a cruciate tear is a unique motion. We reduce it differently from angular deformities like varus or valgus. When casting for the Knee Brace, pull the leg straight down perpendicular to the body. This will reduce the cranial drawer. Trying to cast in a “natural” standing position can cause the tibia to shift forward and adversely affect the fit and function of the custom orthotic. For the Ankle Brace, place the foot and ankle in a natural standing position.   The Wrist Brace reduces any varus (foot angled towards midline) or valgus (foot angled away from midline) deformity and places the foot in a natural standing angle. Typically, the pet is straight through the wrist, but it can vary with breed. If this one is confusing, give us a call, and we can help guide you through the process. Tight - Show us the Boney Landmarks   A Tight Casting is necessary for precision work. When the Hero Braces lab has exact dimensions taken from the Casting, they can create the best custom fit.   The Casting tape should be wrapped snugly to outline the bony prominences or bumps on the leg. If the Casting tape does not have sufficient tension, it will droop and fail to outline the prominences. This creates guesswork for the lab or necessitates another Cast. Remember, no padding is added, just a layer of stockinette to protect the limb. This keeps the Cast true to the leg's shape. Because the Cast will be removed as soon as it hardens, you don’t need to worry about pressure points. High - Capture the Groin   For the stifle, make sure the protective stockinette goes high into the groin or beyond the area to be cast. This is really important to have your helper focus on keeping the stockinette high. Notice where the hands are; it really helps to pull the stockinette high in the inside of the leg. When starting the Cast, casting tape is spiraled up the leg with a 50% overlap. The Casting tape wraps high into the groin for Custom Dog Knee Braces or to the joint above for the Wrist and Ankle Braces. Be sure to wrap to the end of the foot for our Custom Wrist and Ankle Braces. This technique enables the Hero Brace lab to identify landmarks, take measurements, and plan the proper dimensions of the Custom Brace. Criss-Cross - Make it Strong AND Thin This tip will make you happy when it comes time to cut off the cast. A thin cast is so much easier to cut through. A 50% overlap of the Casting material wrapped around the limb is completed by spiraling down at a 45-degree angle, like the spiral on a candy cane. Criss-crossing the material's weave creates a strong yet light Cast. The three layers created are thin enough to be cut off easily, yet they stay together during shipping and at the lab. For reference, download our Casting Tips PDF. For a more in-depth video about casting.  Watch our course from the UT Canine Rehab Lab If you have any questions or need a little help, we are here to support you. Make a quick phone call or send us an email. Hero Braces want to help you help more pets.